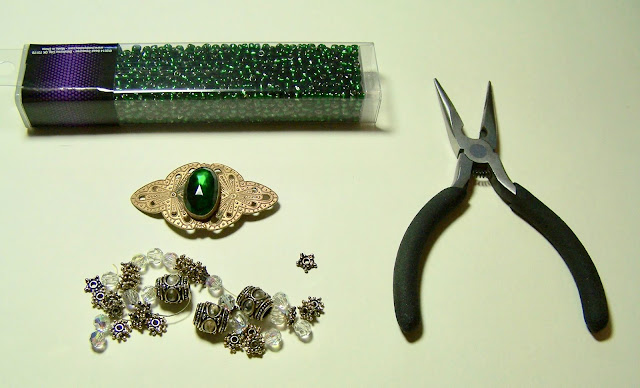
I have had this vintage belt buckle forever...bought it back in the early 80s at an antique roadshow kinda thing. I think I paid $5.00 for it. Originally I planned to make a belt to go with it, but for a variety of reasons the project always got bumped to the back burner while I worked on something else.
When I came across the dark green beads that were the exact same color as the glass jewel in the belt, I remembered my old neglected friend. After bringing it back to the light of day and really looking it over, I decided a necklace would be a better way to use the buckle. Another reason for this decision was that the actual buckle link on the back of the piece looked like pot metal soldered on to the front. After years of use, and being very slightly bent, I was not sure it could have taken the strain of remaking it into a belt.
After playing around with different ideas, in the end I decided to keep it simple and let the vintage buckle be the focal point.
Vintage Belt Buckle Necklace and Earring Set
Vintage, and very possibly an antique, belt buckle, emerald green glass beads, clear glass beads, green aluminum jump rings, gold-tone double jump rings, and gold-tone wire.
This was the original thought...I had pieces from one of those bracelets made on stretchy nylon line that had broken. I was going to use the brass pieces along with the faceted clear beads. Pretty early on I eliminated the brass beads and spacers. They just didn't look right.
Finished necklace and earrings.
Closeup of buckle. The buckle opens behind the glass jewel, which is how the necklace is taken on and off.
This was a fun piece to make, and it was nice to finally be able to use this lovely buckle after having it sit in a drawer for so many decades, waiting for me to be inspired. I have worn this necklace a few times now, and always received a compliment or two.

"To live in the world without becoming aware of the meaning of the world is like wandering about in a great library without touching the books.".....The Secret Teachings of All Ages
"Neither aesthetics nor money-spent make a good studio-it's what you make inside it that really counts"...Shanna Van Maurice, artist.
Thursday, June 27, 2019
Wednesday, June 5, 2019
Recycled Style
In an effort to promote recycling, periodically I am going to post photos of how I put together clothes picked up mainly at the Goodwill, but also at secondhand clothing shops, and antique/junk shops. I hope this will inspire others to try doing the same, since the garment industry is one of the top ten polluters in the world. There are literally millions of garments and accessories out there waiting to be reused. Most take nothing more than a good wash, or minimal mending. Following the photos are some tips on what to look for and what to avoid, and some of the mistakes I have made.
If you are creative, like me, the possibilities are endless. Here is an example.
The shirt was made from two mens XXXL T-shirts, using Simplicity pattern #1463 that I slightly modified. The neck and armhole bindings are strips of T-shirt sewn on with embroidery thread using a fly stitch. The front of the shirt was stenciled and beaded (beaded backstitch) before the shirt was sewn up. I added the beads to the neckline months later.
The necklace is one I made from a broken vintage bracelet found for about $5 at an antique mall.
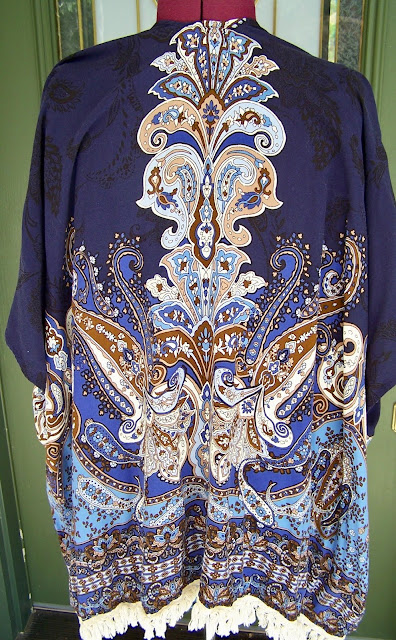
Months later I was trolling through the pajama and nightgown section of our local Goodwill and found this kimono. It was a perfect match and all I had to do was wash it.
This is just one example of how I put things together. Recycling is fun, even if all you do is wash the garment and wear it. I have found lovely linen jackets, silk shirts, denim jackets, and I even found a beautiful, butter-soft black leather jacket for only $24.00.
Here are some tips, and some of the mistakes I've made. Keep in mind, some trips to the Goodwill or secondhand shops I have come out with nothing. Other times I score big time...like the leather jacket.
Read the labels, if they are still attached. It will tell you the fabric content, size, and the washing instructions. Some garments have had the labels cut out, which I find frustrating. I stick with natural fabrics, mostly cotton and linen.
On size. I wear shirts medium to large, depending on the style (I have wide shoulders). Be careful! Some places, including our local Goodwill store, do not separate junior sizes from adult sizes. I tend to eyeball a shirt by holding it up to me and seeing if the shoulder seams are in the right place. This has tricked me a few times. When I get the shirt home and try it on, the underarms are way too tight, and the shirt fits too snug. Junior medium. Lesson learned.
Look for holes in the fabric. Some can be really tiny. Look for stains and pass these garments by, unless you can cut them up and use the fabric on something else (I do this every now and then), as most of the time the stains will not come out.
Try to get a feel for natural fabrics, which will help when the labels are missing from the garment. Just this week I came home with what I thought was a thin cotton, but no label. Washed it and the top shrunk up to doll clothes size. With this particular top, I won't even use it for appliqués, as I have no idea how much further it will shrink. The top already had a couple of tiny holes along the bottom front, and the sales lady just gave me the shirt since she couldn't sell it once she realized it had holes in it, so at least I wasn't out any money on that one. Too bad, 'cause the shirt was really pretty.
This may sound gross, but sniff the shirt, especially the underarms. Some odors never wash out. If you smell anything, pass it by.
If you know how to sew, you can use mens XXXL T-shirts as flat fabric (which is what I did with the shirt in the photos). Cut the sleeves off, but save them if you do appliqués. Cut along ONE side seam and both shoulder seams. After you do that, you can lay the fabric out flat and lay on your patterns. Here is a photo taken out in my garage where my big work table is. As you can see, you end up with a pretty good hunk of fabric. I try to buy shirts with no front pockets, no logos or designs, and all pure cotton.
So there you have it, for this time. Recycling is fun, a good way to save a lot of money on clothes, and a wonderful way to stem the tide of pollution. For creative types, there is even more fun with stitching, beading, stenciling, appliqués, reverse appliqués, embroidery, and customizing patterns. For more examples of stenciled, beaded, and appliquéd shirts, see my previous post.
Enjoy! You can save a ton of money and still be styling it!
Labels:
beading,
Goodwill,
jewelry,
recycled T-shirts,
recycling,
stenciling
Subscribe to:
Comments (Atom)


