Much like my last post, the Covid-19 virus is keeping me home most of the time. So I continue to work with supplies that I have on hand...which for me is quite a lot. Between the beads, jewelry findings, Goodwill T-shirts, paints, and stencils, I am pretty much good to go with almost anything. I also managed to do a cute little birdbath from recycled bits. So, here we go.
All of the items are available other than those marked with an * after the description, which denotes they have already been spoken for.
The top necklace is made of clear crystals (they look pink because they are picking up the color from the dress form), teal blue glass beads, and silver beads. There is a set of simple earrings to match.
The green necklace is made up of green glass beads, gold and green bulge beads, brass spacers, and vintage long glass beads taken from an old necklace that was broken. *
This necklace is made up of brass plaques set with black stones, and what was a filigree brass earring.
Going from top left to right = Silver Celtic knot with yellow bead and silver bees *, Silver Scotch thistle hung with green beads and silver feathers *, Gold faux-coin discs (reverse side has a religious figure but I don't know who it is) with black and gold glass beads.*
Bottom left to right = Clear crystal and dark green beads, Blue squares topped with silver and blue beads, Pale blue squares topped with silver and opaque white mini-crystals.
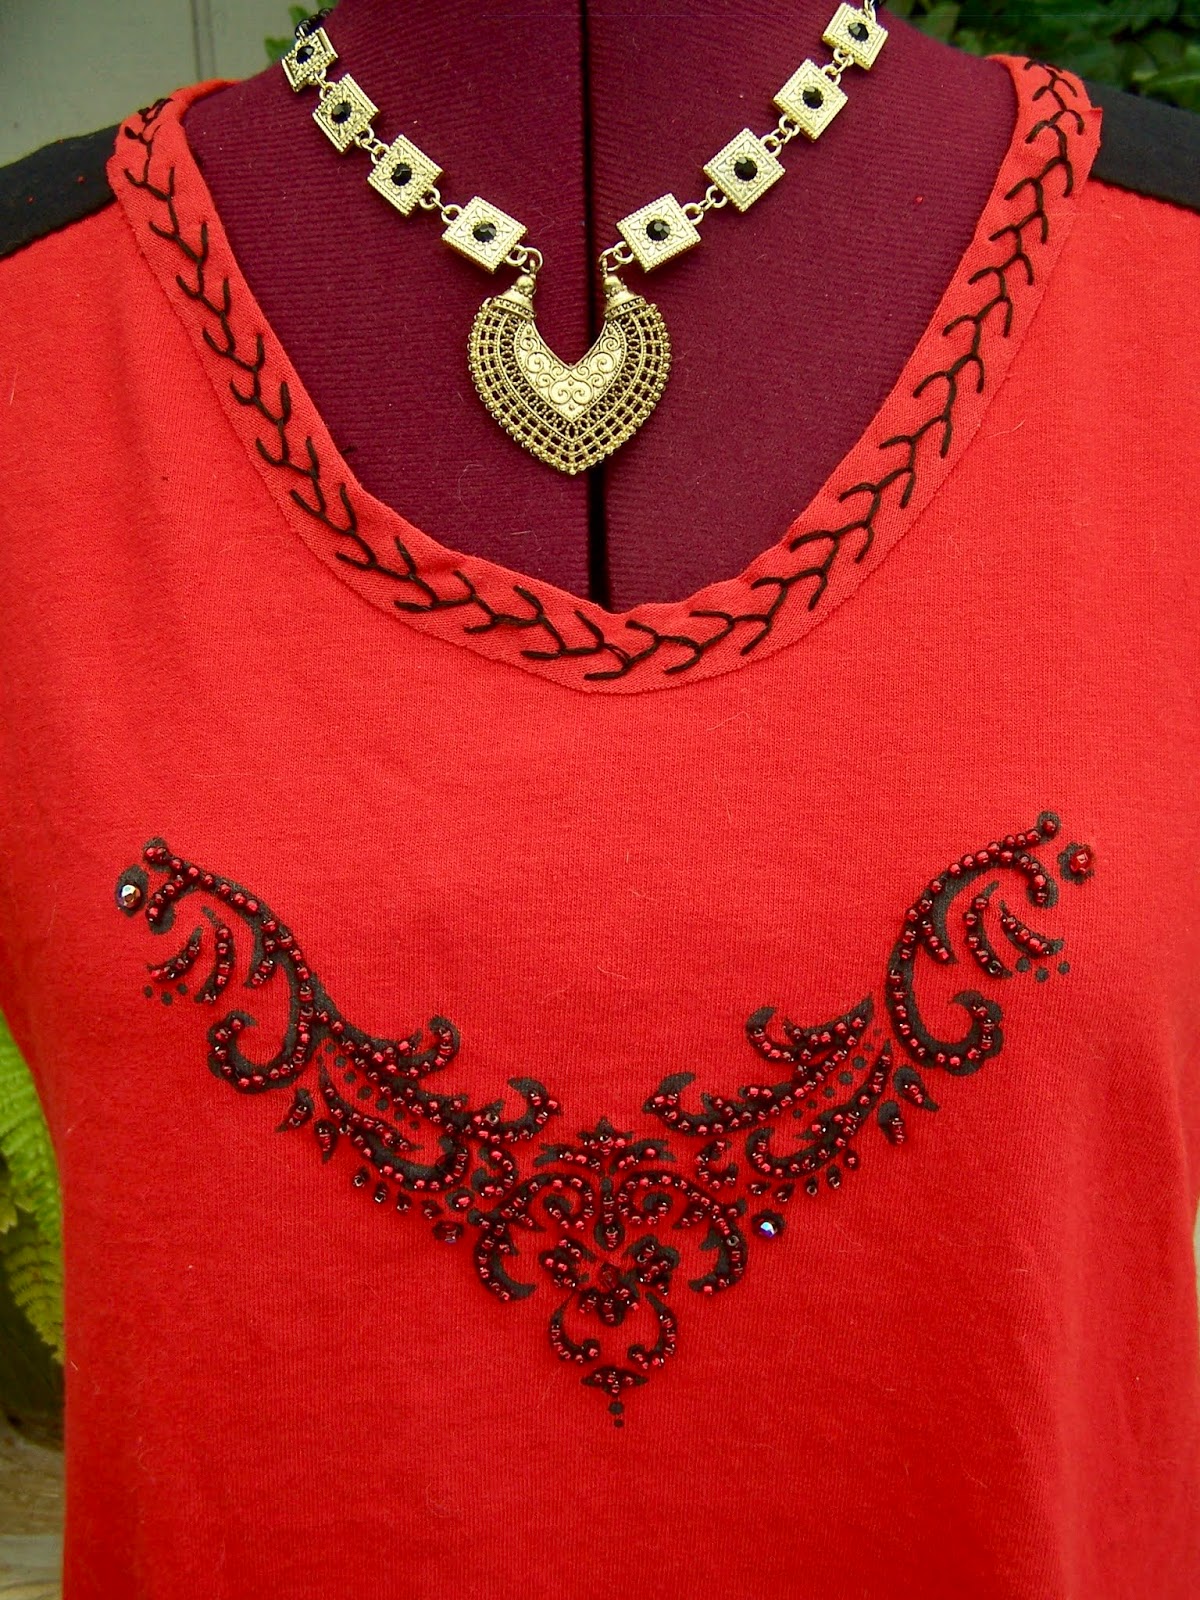
This shirt was one that had been cut out and beaded, then put on a back burner for over a year. I finally finished it. It is made of Goodwill T-shirts, stenciled, and beaded. The binding is sewn on with feather stitch embroidery. I may end up beading the binding as well, but for now at least it is off my "to finish" list. *
This is a shirt I did a while back, but I have decided to let it go. I have a lot of beaded shirts and my closet is starting to look a little OCD with beaded stuff. LOL The T-shirt is a size M, with a stenciled, beaded and stitched appliqué. The center piece is a silver Celtic knot.
And this was my little recycle project. The wire base was a plant cage filled with succulents. They outgrew the basket that was in the bottom, so I took them out, and took off the top of the cage. The glass bowl was a light fixture we took out when we remodeled the kitchen. The small hole in the bottom was plugged with a bit from a kneaded art erasure (I couldn't find my floral putty). I filled the bowl with glass "stones" leftover from those we put in our propane fire pit. I am going to look for some artificial greenery to fill in the bottom of the cage. The crock was one I bought decades ago at the Rose Bowl swap meet, and the slate was leftover from another project. I added a couple of rocks for the birds to stand on and eh voila! Birdbath. It only took the birds about two days to find it and start to use it. There is also a little tree frog that likes to hang out in it as well. That made me quite happy.
If you are interested in anything shown you can leave a comment here and I will get back to you.
Hope you are all staying safe in these chaotic times.
"To live in the world without becoming aware of the meaning of the world is like wandering about in a great library without touching the books.".....The Secret Teachings of All Ages
"Neither aesthetics nor money-spent make a good studio-it's what you make inside it that really counts"...Shanna Van Maurice, artist.
Showing posts with label recycled T-shirts. Show all posts
Tuesday, July 7, 2020
Wednesday, June 5, 2019
Recycled Style
In an effort to promote recycling, periodically I am going to post photos of how I put together clothes picked up mainly at the Goodwill, but also at secondhand clothing shops, and antique/junk shops. I hope this will inspire others to try doing the same, since the garment industry is one of the top ten polluters in the world. There are literally millions of garments and accessories out there waiting to be reused. Most take nothing more than a good wash, or minimal mending. Following the photos are some tips on what to look for and what to avoid, and some of the mistakes I have made.
If you are creative, like me, the possibilities are endless. Here is an example.
The shirt was made from two mens XXXL T-shirts, using Simplicity pattern #1463 that I slightly modified. The neck and armhole bindings are strips of T-shirt sewn on with embroidery thread using a fly stitch. The front of the shirt was stenciled and beaded (beaded backstitch) before the shirt was sewn up. I added the beads to the neckline months later.
The necklace is one I made from a broken vintage bracelet found for about $5 at an antique mall.
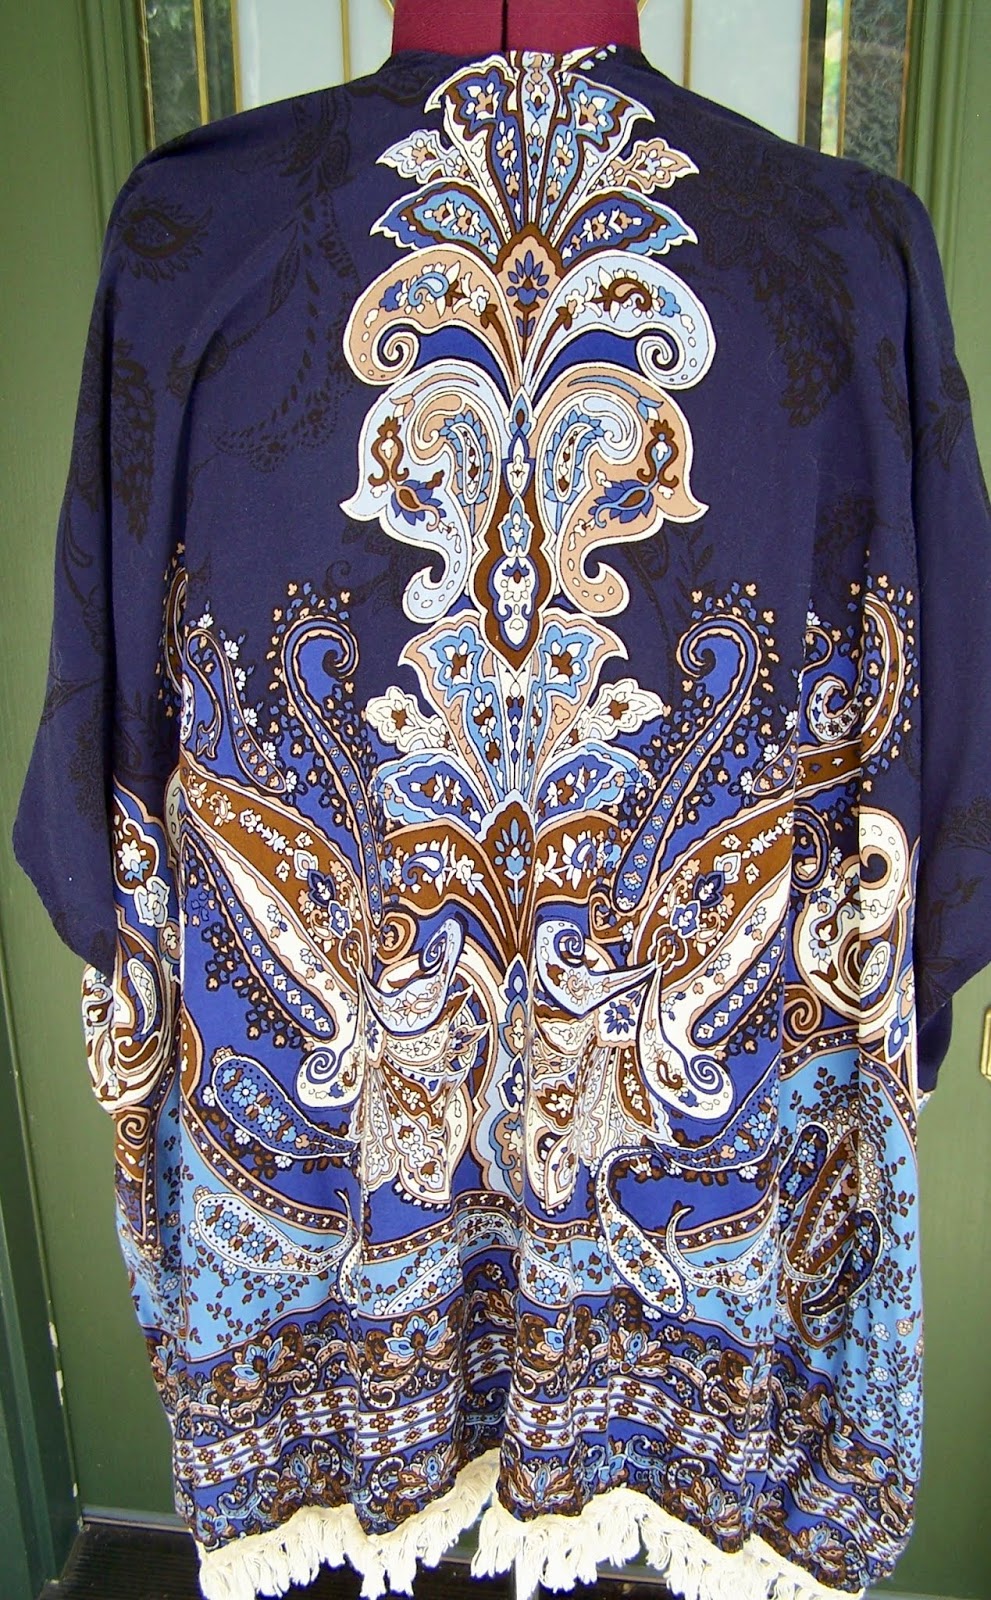
Months later I was trolling through the pajama and nightgown section of our local Goodwill and found this kimono. It was a perfect match and all I had to do was wash it.
This is just one example of how I put things together. Recycling is fun, even if all you do is wash the garment and wear it. I have found lovely linen jackets, silk shirts, denim jackets, and I even found a beautiful, butter-soft black leather jacket for only $24.00.
Here are some tips, and some of the mistakes I've made. Keep in mind, some trips to the Goodwill or secondhand shops I have come out with nothing. Other times I score big time...like the leather jacket.
Read the labels, if they are still attached. It will tell you the fabric content, size, and the washing instructions. Some garments have had the labels cut out, which I find frustrating. I stick with natural fabrics, mostly cotton and linen.
On size. I wear shirts medium to large, depending on the style (I have wide shoulders). Be careful! Some places, including our local Goodwill store, do not separate junior sizes from adult sizes. I tend to eyeball a shirt by holding it up to me and seeing if the shoulder seams are in the right place. This has tricked me a few times. When I get the shirt home and try it on, the underarms are way too tight, and the shirt fits too snug. Junior medium. Lesson learned.
Look for holes in the fabric. Some can be really tiny. Look for stains and pass these garments by, unless you can cut them up and use the fabric on something else (I do this every now and then), as most of the time the stains will not come out.
Try to get a feel for natural fabrics, which will help when the labels are missing from the garment. Just this week I came home with what I thought was a thin cotton, but no label. Washed it and the top shrunk up to doll clothes size. With this particular top, I won't even use it for appliqués, as I have no idea how much further it will shrink. The top already had a couple of tiny holes along the bottom front, and the sales lady just gave me the shirt since she couldn't sell it once she realized it had holes in it, so at least I wasn't out any money on that one. Too bad, 'cause the shirt was really pretty.
This may sound gross, but sniff the shirt, especially the underarms. Some odors never wash out. If you smell anything, pass it by.
If you know how to sew, you can use mens XXXL T-shirts as flat fabric (which is what I did with the shirt in the photos). Cut the sleeves off, but save them if you do appliqués. Cut along ONE side seam and both shoulder seams. After you do that, you can lay the fabric out flat and lay on your patterns. Here is a photo taken out in my garage where my big work table is. As you can see, you end up with a pretty good hunk of fabric. I try to buy shirts with no front pockets, no logos or designs, and all pure cotton.
So there you have it, for this time. Recycling is fun, a good way to save a lot of money on clothes, and a wonderful way to stem the tide of pollution. For creative types, there is even more fun with stitching, beading, stenciling, appliqués, reverse appliqués, embroidery, and customizing patterns. For more examples of stenciled, beaded, and appliquéd shirts, see my previous post.
Enjoy! You can save a ton of money and still be styling it!
If you are creative, like me, the possibilities are endless. Here is an example.
The shirt was made from two mens XXXL T-shirts, using Simplicity pattern #1463 that I slightly modified. The neck and armhole bindings are strips of T-shirt sewn on with embroidery thread using a fly stitch. The front of the shirt was stenciled and beaded (beaded backstitch) before the shirt was sewn up. I added the beads to the neckline months later.
The necklace is one I made from a broken vintage bracelet found for about $5 at an antique mall.
Months later I was trolling through the pajama and nightgown section of our local Goodwill and found this kimono. It was a perfect match and all I had to do was wash it.
This is just one example of how I put things together. Recycling is fun, even if all you do is wash the garment and wear it. I have found lovely linen jackets, silk shirts, denim jackets, and I even found a beautiful, butter-soft black leather jacket for only $24.00.
Here are some tips, and some of the mistakes I've made. Keep in mind, some trips to the Goodwill or secondhand shops I have come out with nothing. Other times I score big time...like the leather jacket.
Read the labels, if they are still attached. It will tell you the fabric content, size, and the washing instructions. Some garments have had the labels cut out, which I find frustrating. I stick with natural fabrics, mostly cotton and linen.
On size. I wear shirts medium to large, depending on the style (I have wide shoulders). Be careful! Some places, including our local Goodwill store, do not separate junior sizes from adult sizes. I tend to eyeball a shirt by holding it up to me and seeing if the shoulder seams are in the right place. This has tricked me a few times. When I get the shirt home and try it on, the underarms are way too tight, and the shirt fits too snug. Junior medium. Lesson learned.
Look for holes in the fabric. Some can be really tiny. Look for stains and pass these garments by, unless you can cut them up and use the fabric on something else (I do this every now and then), as most of the time the stains will not come out.
Try to get a feel for natural fabrics, which will help when the labels are missing from the garment. Just this week I came home with what I thought was a thin cotton, but no label. Washed it and the top shrunk up to doll clothes size. With this particular top, I won't even use it for appliqués, as I have no idea how much further it will shrink. The top already had a couple of tiny holes along the bottom front, and the sales lady just gave me the shirt since she couldn't sell it once she realized it had holes in it, so at least I wasn't out any money on that one. Too bad, 'cause the shirt was really pretty.
This may sound gross, but sniff the shirt, especially the underarms. Some odors never wash out. If you smell anything, pass it by.
If you know how to sew, you can use mens XXXL T-shirts as flat fabric (which is what I did with the shirt in the photos). Cut the sleeves off, but save them if you do appliqués. Cut along ONE side seam and both shoulder seams. After you do that, you can lay the fabric out flat and lay on your patterns. Here is a photo taken out in my garage where my big work table is. As you can see, you end up with a pretty good hunk of fabric. I try to buy shirts with no front pockets, no logos or designs, and all pure cotton.
So there you have it, for this time. Recycling is fun, a good way to save a lot of money on clothes, and a wonderful way to stem the tide of pollution. For creative types, there is even more fun with stitching, beading, stenciling, appliqués, reverse appliqués, embroidery, and customizing patterns. For more examples of stenciled, beaded, and appliquéd shirts, see my previous post.
Enjoy! You can save a ton of money and still be styling it!
Labels:
beading,
Goodwill,
jewelry,
recycled T-shirts,
recycling,
stenciling
Thursday, January 14, 2016
Two Projects Finished
In December I had two projects that were sitting around half done. The T-shirt with beading over a stencil, and the red sweatshirt sitting out on the work table in the garage with soap lines drawn on it, but nothing more.
The beaded T-shirt I completed right before Christmas, and wore it to the family champagne brunch we always do at our place Christmas morning. This is my first time doing beaded backstitch over a stencil and I ended up really like the results.
The photos make the shirt look greenish, but it is a lovely turquoise. I enjoyed beading over the stencil so much, that I want to try it again. Also, I volunteered to teach a class in April on the technique of beaded backstitch using a stencil as a template. My first time teaching a class, so that should be interesting!
The second project was the red sweatshirt. I had originally intended to cut it up the front and make a jacket out of it. After thinking it over, and taking an inventory of jackets, shrugs, and boleros that I already owned, I decided to go a different way, so I rubbed out the soap marks. And because the weather has been dark, gloomy and rainy, I wanted something bright and cheerful. So, I cut the sleeves shorter, cut the banding off from the neckline and the bottom edge, and added T-shirt binding leftover from other projects. The shoulder decoration is also made from leftover bolero projects. All of it hand stitched. I wanted this to be a little funky, a style I don't usually do, so left all the knots and tails of thread showing. When I finished the stitching, I added small brass washers I had purchased a long time ago in the hardware department at Home Depot (a great source if bits and bobs, the hardware section).
This sweatshirt was very wide, but once I cut off the bottom binding and shortened the sleeves, it worked really well over a long-sleeved T-shirt, which is what I had in mind. I may, at some point, go back and add beads (I have some small, fiery red ones that would look great), but for now I am calling it done.
The above photo shows how the binding strips go over the shoulder seam, so when I wear it, the decoration will show on both the front and the back of the sweatshirt.
The bands were sewn length-wise with embroidery thread, then sewn across with a running stitch done with regular sewing thread, as were the brass washers.
This turned out to be a great way to use up T-shirt bindings, and short lengths of embroidery thread leftover from other projects, and it was fun to do something a little outside my usual box.
Oh, and both garments came from the Goodwill Store.
The beaded T-shirt I completed right before Christmas, and wore it to the family champagne brunch we always do at our place Christmas morning. This is my first time doing beaded backstitch over a stencil and I ended up really like the results.
The photos make the shirt look greenish, but it is a lovely turquoise. I enjoyed beading over the stencil so much, that I want to try it again. Also, I volunteered to teach a class in April on the technique of beaded backstitch using a stencil as a template. My first time teaching a class, so that should be interesting!
The second project was the red sweatshirt. I had originally intended to cut it up the front and make a jacket out of it. After thinking it over, and taking an inventory of jackets, shrugs, and boleros that I already owned, I decided to go a different way, so I rubbed out the soap marks. And because the weather has been dark, gloomy and rainy, I wanted something bright and cheerful. So, I cut the sleeves shorter, cut the banding off from the neckline and the bottom edge, and added T-shirt binding leftover from other projects. The shoulder decoration is also made from leftover bolero projects. All of it hand stitched. I wanted this to be a little funky, a style I don't usually do, so left all the knots and tails of thread showing. When I finished the stitching, I added small brass washers I had purchased a long time ago in the hardware department at Home Depot (a great source if bits and bobs, the hardware section).
This sweatshirt was very wide, but once I cut off the bottom binding and shortened the sleeves, it worked really well over a long-sleeved T-shirt, which is what I had in mind. I may, at some point, go back and add beads (I have some small, fiery red ones that would look great), but for now I am calling it done.
The above photo shows how the binding strips go over the shoulder seam, so when I wear it, the decoration will show on both the front and the back of the sweatshirt.
The bands were sewn length-wise with embroidery thread, then sewn across with a running stitch done with regular sewing thread, as were the brass washers.
This turned out to be a great way to use up T-shirt bindings, and short lengths of embroidery thread leftover from other projects, and it was fun to do something a little outside my usual box.
Oh, and both garments came from the Goodwill Store.
Labels:
applique,
beading,
recycled T-shirts,
stencils
Thursday, April 23, 2015
Dragonfly T-Shirt
While my computer was down this is the project I was working on, and just finished yesterday. It is another project involving stencils, which I love. The shirt is from the Goodwill (big surprise) and the blue bit is from the sleeve of an old T-shirt of mine, and the purple bit is from a piece left over from a bolero I made quite a while back. The beads are from my stash.
The stencil if from Martha Stewart, bought at Michaels craft store. The paint is DecoArt in Glamour Dust Purple Passion. It is a glitter paint, but not bright, cheesy glitter. It is very fine, like fairy dust.
This photo makes the material look green. It isn't, but you can see how fine the glitter is.
The dragonfly appliqué is stitched onto the shirt with a beaded backstitch, using doubled regular sewing thread. The stitching around the dragonfly is a single thread, while the swirls with pearls (he, he), are again doubled threads. I figure since all of the clothes I have made over the years have held together just fine using regular sewing thread, using it for this should be no problem. Embroidery thread would have been too thick.
When I had finished doing the dragonfly appliqué, I decided the design looked a bit skimpy, so I added the lettering piece. It is sewn on with a doubled thread, with beads at each corner. The letters were a stamp, and it didn't come out as bright as I thought it would, so I did tiny, single thread stitches within the stamped letters, to get them to show up better. The paint was more of the DecoArt, satin finish (no glitter), in a color called Coastal Waters. This is the first experiments I have done with the DecoArt paints, which are supposed to be multi-surface, with fabric being one of those. I saw them at Michaels craft store, and really hoped they would work out, since there are a bazillion colors to choose from, including metallics, and more colors with fine glitter. I have a metallic copper I am going to try next. So far, I like them, but they do make the fabric a bit stiff.
I think the lettering piece would be a lot better if the paint had been brighter, but, oh well. I still like the way the shirt came out. I wanted to keep it all pretty simple, so this one is done. I will not be adding beads or stitching to the neckline and sleeves of the T-shirt, like I have done on other projects.
Now it's on to the next sewing project, which will be an SCA riding tunic for Robert. We have an event coming up in May, and all of his other costumes are 30+ years old, so I think he deserves something new. All I have to do is clear off my work table in the garage, which since the last time I used it has collected a bunch of clutter that needs to be put away.
I also have another drawing in the gypsy series I want to start...maybe today.
And the garden is in and the new veggies need watering.
And the horse stalls need cleaning.
Always something...
The stencil if from Martha Stewart, bought at Michaels craft store. The paint is DecoArt in Glamour Dust Purple Passion. It is a glitter paint, but not bright, cheesy glitter. It is very fine, like fairy dust.
This photo makes the material look green. It isn't, but you can see how fine the glitter is.
The dragonfly appliqué is stitched onto the shirt with a beaded backstitch, using doubled regular sewing thread. The stitching around the dragonfly is a single thread, while the swirls with pearls (he, he), are again doubled threads. I figure since all of the clothes I have made over the years have held together just fine using regular sewing thread, using it for this should be no problem. Embroidery thread would have been too thick.
When I had finished doing the dragonfly appliqué, I decided the design looked a bit skimpy, so I added the lettering piece. It is sewn on with a doubled thread, with beads at each corner. The letters were a stamp, and it didn't come out as bright as I thought it would, so I did tiny, single thread stitches within the stamped letters, to get them to show up better. The paint was more of the DecoArt, satin finish (no glitter), in a color called Coastal Waters. This is the first experiments I have done with the DecoArt paints, which are supposed to be multi-surface, with fabric being one of those. I saw them at Michaels craft store, and really hoped they would work out, since there are a bazillion colors to choose from, including metallics, and more colors with fine glitter. I have a metallic copper I am going to try next. So far, I like them, but they do make the fabric a bit stiff.
I think the lettering piece would be a lot better if the paint had been brighter, but, oh well. I still like the way the shirt came out. I wanted to keep it all pretty simple, so this one is done. I will not be adding beads or stitching to the neckline and sleeves of the T-shirt, like I have done on other projects.
Now it's on to the next sewing project, which will be an SCA riding tunic for Robert. We have an event coming up in May, and all of his other costumes are 30+ years old, so I think he deserves something new. All I have to do is clear off my work table in the garage, which since the last time I used it has collected a bunch of clutter that needs to be put away.
I also have another drawing in the gypsy series I want to start...maybe today.
And the garden is in and the new veggies need watering.
And the horse stalls need cleaning.
Always something...
Labels:
beading,
dragonfly T-shirt,
Goodwill,
recycled T-shirts,
stenciling
Friday, August 23, 2013
Crown Bolero - Layout
Here is the results from the stenciling. I wasn't sure how my own drawn and cut stencil would work, and as it turned out, would have been better on heavier paper. All I had on hand was a heavier grade drawing paper, which isn't meant for wet mediums. It worked, but barely.
The Lumiere paint I had was old, and getting a bit thick, so I added some water and stirred the dickens out of it. However, I think that is why I ended up with a rather mottled look to the paint. At first I was upset. But the more I looked at it the better I liked it. The uneven coverage gave the crown an antique look, like old gilding that has started to wear off. The center portions of the base of the crown I did not even try to cover, as all of that will be cut away when I do the reverse applique. Why waste the paint?
The arrowhead shape and the long center shape I cut out of tape and stuck to the shirt so it would leave the negative space in the design. That was another experiment that turned out well. Those negative spaces will stay the color of the shirt, and most of the gold cut away around them to reveal the purple underneath.
Here are all the elements ready to pin together. You can see how my paper stencil buckled, so next time I will get some good heavy stock, or even see if I can find stencil plastic, if I do anything like this again. The tiny pieces of paper are the negative spaces that I used as a template for the tape.
And here are all the pieces pinned together and ready to start sewing on. The thread is regular sewing thread, but heavy duty, and I will double it. I will use that to outline all the design elements. I will probably use embroidery thread for any other decoration, and will use that to sew up the bolero when the fun of stitching and beading is done. Last will be to add the dark teal binding around the edges.
The Lumiere paint I had was old, and getting a bit thick, so I added some water and stirred the dickens out of it. However, I think that is why I ended up with a rather mottled look to the paint. At first I was upset. But the more I looked at it the better I liked it. The uneven coverage gave the crown an antique look, like old gilding that has started to wear off. The center portions of the base of the crown I did not even try to cover, as all of that will be cut away when I do the reverse applique. Why waste the paint?
The arrowhead shape and the long center shape I cut out of tape and stuck to the shirt so it would leave the negative space in the design. That was another experiment that turned out well. Those negative spaces will stay the color of the shirt, and most of the gold cut away around them to reveal the purple underneath.
Here are all the elements ready to pin together. You can see how my paper stencil buckled, so next time I will get some good heavy stock, or even see if I can find stencil plastic, if I do anything like this again. The tiny pieces of paper are the negative spaces that I used as a template for the tape.
And here are all the pieces pinned together and ready to start sewing on. The thread is regular sewing thread, but heavy duty, and I will double it. I will use that to outline all the design elements. I will probably use embroidery thread for any other decoration, and will use that to sew up the bolero when the fun of stitching and beading is done. Last will be to add the dark teal binding around the edges.
Labels:
Alabama Chanin,
crown bolero,
recycled T-shirts,
stenciling,
stitching
Tuesday, August 20, 2013
Crown Bolero - Design & Color
I have been thinking about his design for awhile, and decided on the muted colors after seeing a reproduction of an Italian tapestry from the fifteen-hundreds. The photo of the tapestry had been darkened for use as background for a rather dark and gloomy fashion ad. But I kinda like dark and gloomy (except rain and gloom all winter. That I don't like at all). I suspect there is more Morticia Adams in me than I care to admit.
Anyway, here are the crown designs I played with, made by folding a sheet of printer paper in half and just cutting away freehand. Like making those paper snowflakes when you were a kid.
Then I took these and played a bit more with cutouts. I can't get too carried away with those, as this will be a stencil. The design, once stenciled on the shirt, and stitched around, will then be cut away to reveal the second layer of fabric underneath — a reverse applique — so the design has to stay pretty simple. Next, I will draw the crown on heavy cardstock paper, and cut it out to make the stencil.
I didn't like the one on the top right at all, so eliminated it straight away. It was too clunky looking. In the end, I decided I liked the spiky quality of the one on the top left.
The hard part was the color. I wanted muted, except maybe for the crown, but even that couldn't be an in-your-face color, or cheesy, like a fake gold lame' or something. I wanted an old, faded, tapestry look without it being made of old tapestry material. And without the old tapestry dust.
So here is what I came up with, all from T-shirts purchased at the Goodwill. The light gray-green will be the main color of the bolero. The royal purple with be for the crown - of course. And the dark teal with be the binding color. The crown will be stenciled with Lumiere antique gold paint, which will only be an outline once the fabric is cut away. The small fleur d'lis will be stenciled on the front panels of the bolero and then cut out in reverse applique like the crown. After that, it will be stitching and beading. Not sure of the binding stitching color yet, but might be a lighter purple than the crown, or something that matches the gray-green. In any case, something that shows up nicely on the dark teal. That's still undecided (there is an insidious little voice in my head telling me to use metallic thread. I did that on my first bolero and loved the look, but hated working with that thread. It breaks, kinks, and doesn't go in the needles very well, so I am slapping a mental hand over that inner voice's mouth).
I am going to have a lot of fun adding beads to that crown! In fact, I like that crown design so much, that I can also envision it in black on a red bolero...or red on black. My husband gets tons of either red or black promo T-shirts from work, so I would have plenty of material to do either.
So, that's my current project, The Crown Bolero.
Anyway, here are the crown designs I played with, made by folding a sheet of printer paper in half and just cutting away freehand. Like making those paper snowflakes when you were a kid.
Then I took these and played a bit more with cutouts. I can't get too carried away with those, as this will be a stencil. The design, once stenciled on the shirt, and stitched around, will then be cut away to reveal the second layer of fabric underneath — a reverse applique — so the design has to stay pretty simple. Next, I will draw the crown on heavy cardstock paper, and cut it out to make the stencil.
I didn't like the one on the top right at all, so eliminated it straight away. It was too clunky looking. In the end, I decided I liked the spiky quality of the one on the top left.
The hard part was the color. I wanted muted, except maybe for the crown, but even that couldn't be an in-your-face color, or cheesy, like a fake gold lame' or something. I wanted an old, faded, tapestry look without it being made of old tapestry material. And without the old tapestry dust.
So here is what I came up with, all from T-shirts purchased at the Goodwill. The light gray-green will be the main color of the bolero. The royal purple with be for the crown - of course. And the dark teal with be the binding color. The crown will be stenciled with Lumiere antique gold paint, which will only be an outline once the fabric is cut away. The small fleur d'lis will be stenciled on the front panels of the bolero and then cut out in reverse applique like the crown. After that, it will be stitching and beading. Not sure of the binding stitching color yet, but might be a lighter purple than the crown, or something that matches the gray-green. In any case, something that shows up nicely on the dark teal. That's still undecided (there is an insidious little voice in my head telling me to use metallic thread. I did that on my first bolero and loved the look, but hated working with that thread. It breaks, kinks, and doesn't go in the needles very well, so I am slapping a mental hand over that inner voice's mouth).
I am going to have a lot of fun adding beads to that crown! In fact, I like that crown design so much, that I can also envision it in black on a red bolero...or red on black. My husband gets tons of either red or black promo T-shirts from work, so I would have plenty of material to do either.
So, that's my current project, The Crown Bolero.
Monday, April 8, 2013
ETT — A Few Process Photos & Comments
Okay, these are probably the last photos of the ETT I will post. I think it has arrived at that "enough is enough" point. LOL Here are a few process photos, and some explanations of why I did what I did, and what I would do differently.
So, this is what I started with. One teal-blue White Stag T-shirt, and a $2.99 Goodwill find baby doll dress that was too small for me.
This is the finished tunic (the sun came out long enough for me to get this photo!)
Right off, the first thing I would change is the bodice. It ended up too wide. I had left it on the wide side so I could wear the tunic over other T-shirts, but it ended up looking a bit too baggy, and needs tightening up for a better fit. Also, I am still debating whether to add some kind of design to the front. Now that I look at it, that is a pretty big expanse of blue. The reason I left it undecorated, is that I wear a lot of my own jewelry, and don't like it when the clothes and the jewelry fight each other for attention.
Here is the skirt, cut off of the baby doll dress yoke. I cut it above the seam that attached it to the yoke, mainly because I was afraid if I cut below the seam, the thing would stretch out and I would have to re-gather it up with straight stitches, which I didn't want to mess with if I didn't have to. As it turned out, the skirt ended up a bit smaller than the top of the tunic, so as I pinned it on, I had to stretch the seam, and in some places actually break the threads. Bottom line, it took a lot of futzing around to get the skirt on the tunic top. I sewed the skirt on to the tunic with a double row of chain stitch about an inch or so below the seam, then when finished, I VERY CAREFULLY cut the seam off.
The skirt pinned to the yoke of the tunic. As stated...lots of futzing to get it to fit. There are about two inches of blue tunic behind and below that pinned seam, which gave me lots of space to add the double row of chain stitch. Also I figured it would help keep the skirt hanging correctly, and help prevent the skirt from rolling under if there was only an inch or so of tunic behind the chain stitches.
And here is the finished skirt...attached with the double row of chain stitch, the old seam trimmed away, and then the chain stitch beaded. I also trimmed about three inches from the length of the skirt, as it hit right at my knees. I didn't want a dress, I wanted a tunic to wear with jeans.
And the final photo, showing the fit and length (the front and back are exactly the same, so even though you don't see the front of the piece, you're not missing anything...except me going without a bra. NOT pretty and NOT for posting on the internet!). It also shows how the tunic would fit better if the top part was adjusted to be not so wide. I think it would eliminate those loose fabric folds you can see, right above where the skirt attaches to the bodice.
Oh, only one last thing to add to the tunic. From now on I am putting my own clothing labels inside each piece. Just a small section of fabric with the same cartouche design using my initials that I use on my drawings and paintings, and then the year. For now I use a brown calligraphy-point Sharpi, but eventually I would like to make either a rubber stamp or a stencil for the label.
Now that this tunic is done, would I make another one? Yes, with a few adjustments. However, I will wear this one, as it is comfy and looks okay over T-shirts...and because I spent flipping FOREVER sewing on all those little beads! LOL
So, this is what I started with. One teal-blue White Stag T-shirt, and a $2.99 Goodwill find baby doll dress that was too small for me.
This is the finished tunic (the sun came out long enough for me to get this photo!)
Right off, the first thing I would change is the bodice. It ended up too wide. I had left it on the wide side so I could wear the tunic over other T-shirts, but it ended up looking a bit too baggy, and needs tightening up for a better fit. Also, I am still debating whether to add some kind of design to the front. Now that I look at it, that is a pretty big expanse of blue. The reason I left it undecorated, is that I wear a lot of my own jewelry, and don't like it when the clothes and the jewelry fight each other for attention.
Here is the skirt, cut off of the baby doll dress yoke. I cut it above the seam that attached it to the yoke, mainly because I was afraid if I cut below the seam, the thing would stretch out and I would have to re-gather it up with straight stitches, which I didn't want to mess with if I didn't have to. As it turned out, the skirt ended up a bit smaller than the top of the tunic, so as I pinned it on, I had to stretch the seam, and in some places actually break the threads. Bottom line, it took a lot of futzing around to get the skirt on the tunic top. I sewed the skirt on to the tunic with a double row of chain stitch about an inch or so below the seam, then when finished, I VERY CAREFULLY cut the seam off.
The skirt pinned to the yoke of the tunic. As stated...lots of futzing to get it to fit. There are about two inches of blue tunic behind and below that pinned seam, which gave me lots of space to add the double row of chain stitch. Also I figured it would help keep the skirt hanging correctly, and help prevent the skirt from rolling under if there was only an inch or so of tunic behind the chain stitches.
And here is the finished skirt...attached with the double row of chain stitch, the old seam trimmed away, and then the chain stitch beaded. I also trimmed about three inches from the length of the skirt, as it hit right at my knees. I didn't want a dress, I wanted a tunic to wear with jeans.
And the final photo, showing the fit and length (the front and back are exactly the same, so even though you don't see the front of the piece, you're not missing anything...except me going without a bra. NOT pretty and NOT for posting on the internet!). It also shows how the tunic would fit better if the top part was adjusted to be not so wide. I think it would eliminate those loose fabric folds you can see, right above where the skirt attaches to the bodice.
Oh, only one last thing to add to the tunic. From now on I am putting my own clothing labels inside each piece. Just a small section of fabric with the same cartouche design using my initials that I use on my drawings and paintings, and then the year. For now I use a brown calligraphy-point Sharpi, but eventually I would like to make either a rubber stamp or a stencil for the label.
Now that this tunic is done, would I make another one? Yes, with a few adjustments. However, I will wear this one, as it is comfy and looks okay over T-shirts...and because I spent flipping FOREVER sewing on all those little beads! LOL
Wednesday, March 27, 2013
ETT — Update
After having put everything on hold for over a week while I recovered from The Crud, I have now gone back and done a bit of work on the Empire T-Tunic. I really like the color combination, and I have noticed that my embroidery stitching is getting better, and more uniform looking. Nice to know there is improvement there, as my hand stitching work is not all that great.
Here is the bodice cut out and sewn together. The necklace is one of mine, made from a vintage section of bracelet.
Here is the bodice with the black binding, sewn with embroidery thread. I picked a color of teal one shade lighter than the shirt, because I didn't think the dark teal would show up very well on the black. I think it was a wise decision, as the slightly lighter thread looks perfect.
Here is a close up of the stitching...and the necklace.
Next step is to add the black pleated skirt, and then to bead the binding. I don't think I'm going to put any applique or stenciling on the bodice. I kinda like it plain, and think the beading around the neckline, armholes, and where the skirt will be sewn on should be enough decoration for this piece.
Note: I have tried posting photos on the "Extra-Large" setting, but they bleed over into the blog sidebar and it looks sloppy. So, if you want to see a larger version of the photos, I'm afraid you'll have to click into each one. Sorry 'bout that.
Here is the bodice cut out and sewn together. The necklace is one of mine, made from a vintage section of bracelet.
Here is the bodice with the black binding, sewn with embroidery thread. I picked a color of teal one shade lighter than the shirt, because I didn't think the dark teal would show up very well on the black. I think it was a wise decision, as the slightly lighter thread looks perfect.
Here is a close up of the stitching...and the necklace.
Next step is to add the black pleated skirt, and then to bead the binding. I don't think I'm going to put any applique or stenciling on the bodice. I kinda like it plain, and think the beading around the neckline, armholes, and where the skirt will be sewn on should be enough decoration for this piece.
Note: I have tried posting photos on the "Extra-Large" setting, but they bleed over into the blog sidebar and it looks sloppy. So, if you want to see a larger version of the photos, I'm afraid you'll have to click into each one. Sorry 'bout that.
Labels:
Alabama Chanin,
altered clothing,
embroidery,
recycled T-shirts,
T-Tunic
Subscribe to:
Posts (Atom)